Preparation
Part 1: Overview of TBL
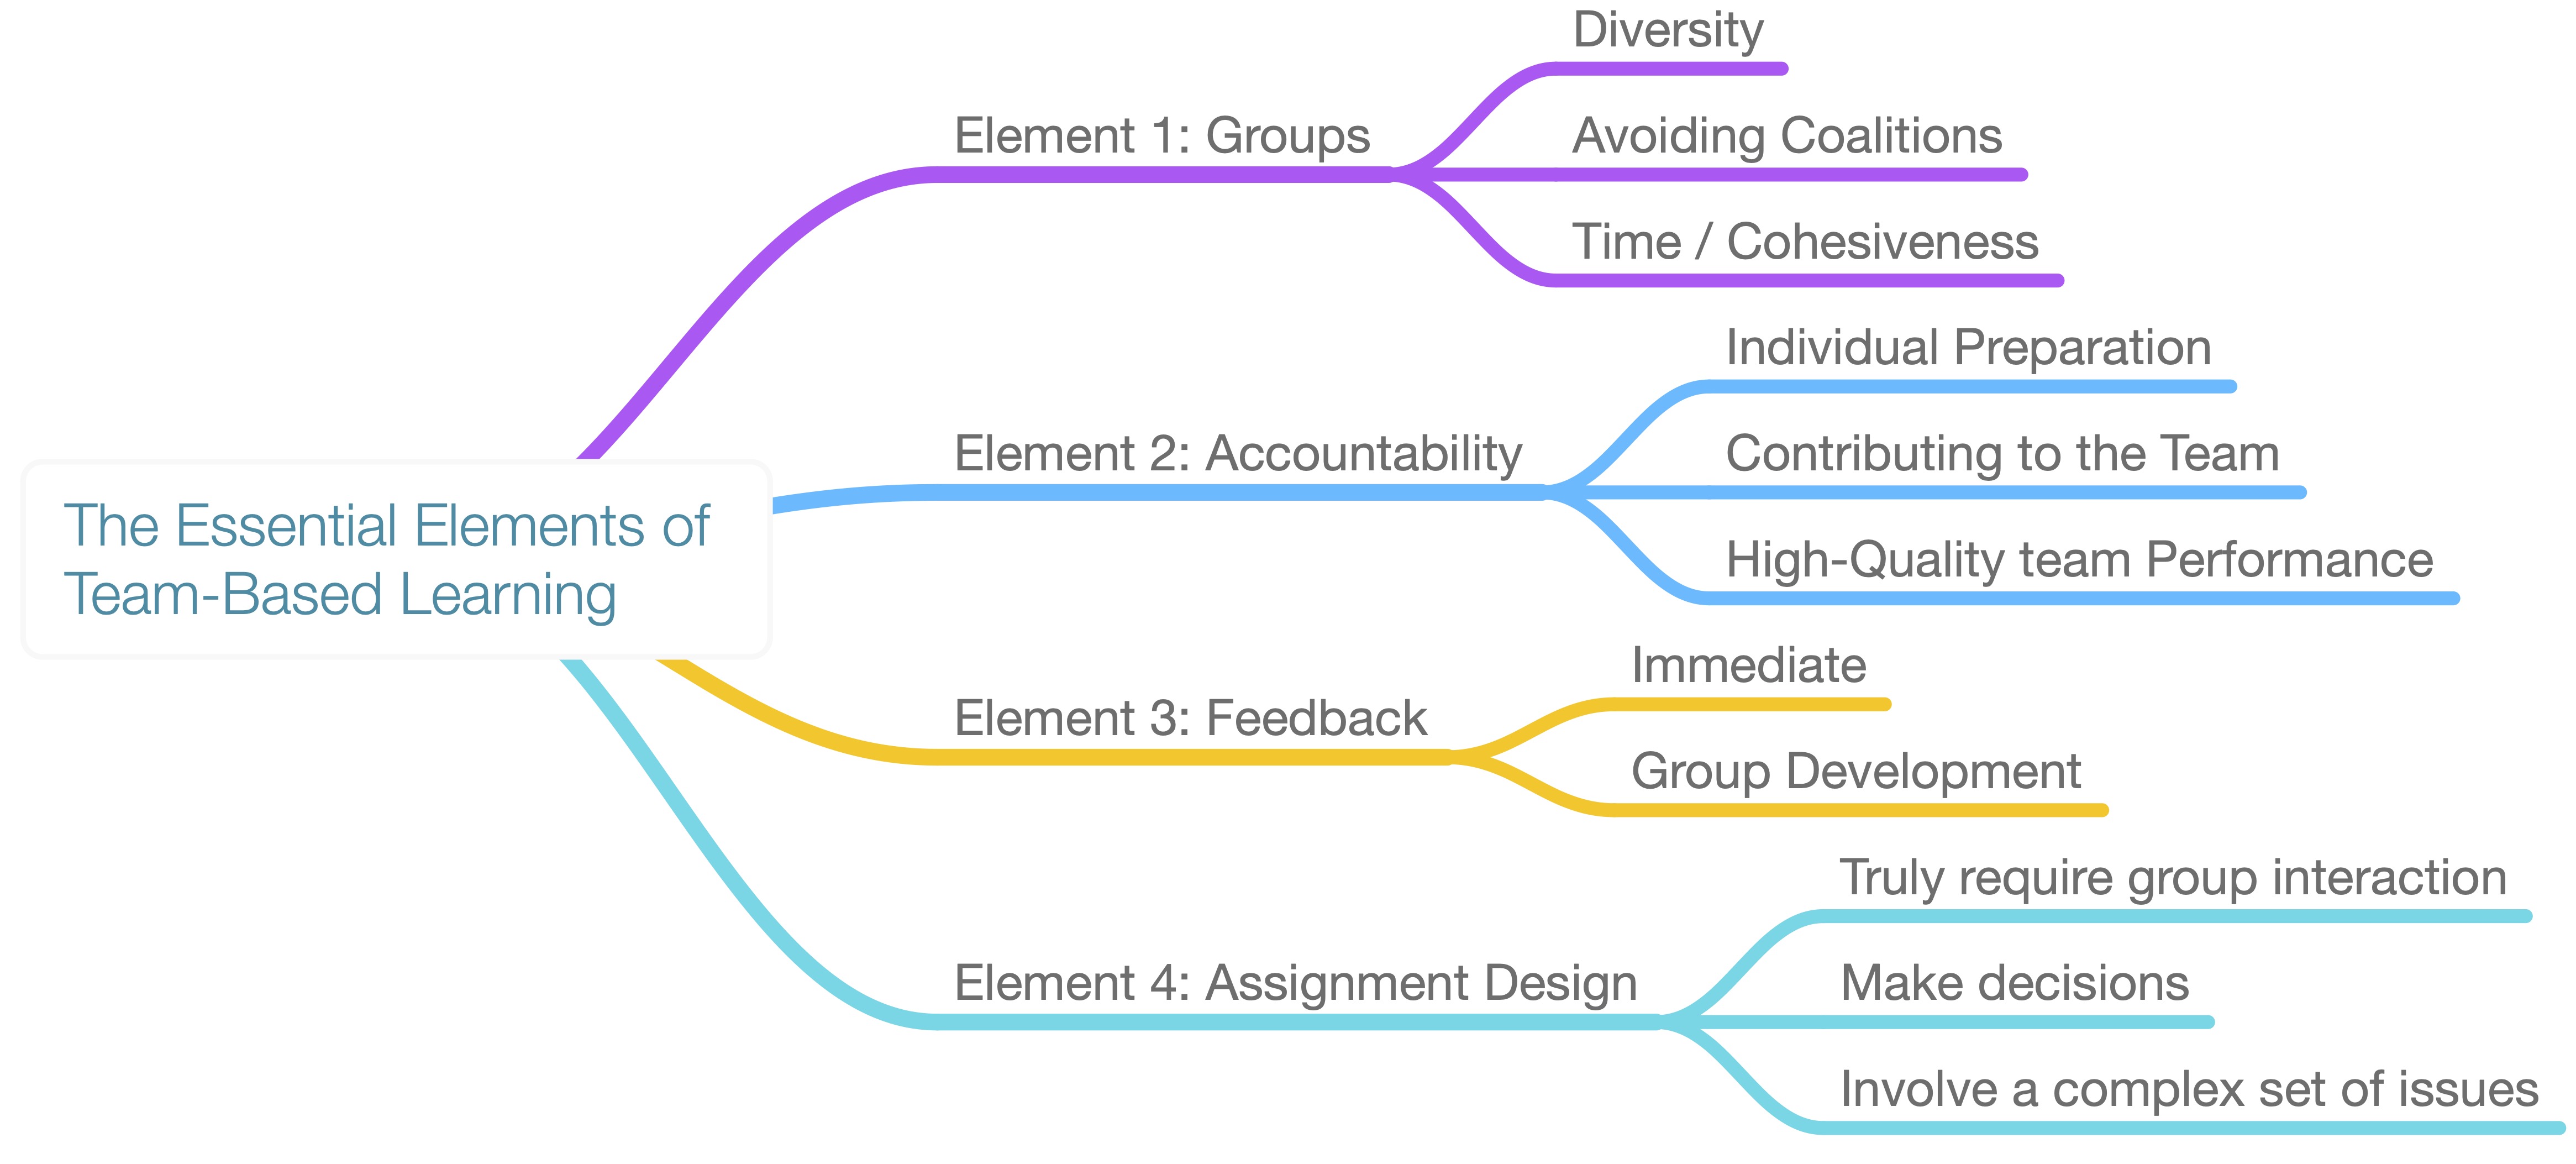
Read through the following overview that introduces you to some of the elements of TBL.
Part 2: Article on TBL
In the introduction above, we covered most of the concepts at the surface of TBL. We have only talked about what is happening, not why, and left out some details. But this framework will help you as a guide through the next article, which dives deeper into the principles that are at work.
Download the Word document below. In it you collect all material from the following preparation tasks P1 to P6 and will later prepare for your field trial. This is also the document you hand in at the end to conclude the module.
Task P1: After reading this article, list three concepts of TBL that you recall and that you find interesting (in a positive sense) from the viewpoint of an instructor. Don’t think long about this, write down which ones come to your mind first.
Task P2: List three concepts or properties that you think are challenging for an instructor, or which you are most sceptical about. Again, don’t think long about this, write down which ones come to your mind first.
Part 3: Preparation of Teaching Unit
One goal of this module is to apply concepts of active learning using TBL to your own course material. This is probably the most useful, but also the most difficult part. For a good learning outcome for this module, it is not necessary that you design a complete TBL unit. A partial one, with some critical elements may be sufficient for you to apply the most important concepts. A minimal version of a TBL session consists of the following elements:
- A preparation task for the students
- A (minimal) RAT, done individually and in teams
- A (short) team activity
Task P3: In which course can you place such an activity? The RAT will take between 20 to 40 minutes, and the team activity can be all from 5 minutes to 30 minutes. If you don’t have your own course between the two sessions, you can also help a colleague in their course.
Backward Design
To ensure alignment between learning activities and learning outcomes, it often helps to design units backwards. That means, to start with the desired learning outcomes, and then going backwards to the required learning activities and preparation material to achieve these learning outcomes.
The following tasks help you to prepare the field trial in your own teaching. You do not have to completely solve them before the first session, but starting to think about your field trial will help you to ask the right questions in our first session.
Task P4, Learning Outcome: What do you want your students to achieve after the learning unit? Think of learning goals and outcomes, but be maybe even more specific: Think of a concrete skill that would make you recognize that the student learned. Which specific learning effect would you like to achieve?
Example: I have one unit on a specific diagram type for systems engineering. I would like that a student who visited my course will stand up during a technical discussion with future co-workers, go to a whiteboard and clarify a specific technical issue using this specific type of diagram.
Task P5, Learning Activities: Now think which specific activity that would be suitable to train this effect you would like to achieve. Can you manage to design an activity that follows the 4-S principles?
Example: As one activity in my course, the student teams select among different diagram solutions to pick the one they think describes a system best, in a classic A-B-C-D choice.
This choice among alternatives does not necessarily mean that tasks are simple. Choices may require work to distinguish alternatives and to justify a decision by the team. If you don’t manage to come up with a task fulfilling all of the 4-S principles (significant, same, specific choice and simultaneous delivery) skip some of the properties. You can plan for one or more such activities.
Task P6: Required Knowledge: Think which knowledge is a necessary precondition for the activity and think specifically how (1) students can prepare to acquire that knowledge, i.e., if you have some preparation material you can provide them, and (2) if you can make several quiz questions about that material.
Example: I provide students with a guide to the specific diagram type and add a video that covers some practicalities with a drawing tool.
Don’t worry too much if the alignment isn’t perfect on the first attempt, or if you don’t come up with a good activity before the first session. We will provide some more help on crafting this learning material during the first session, but this first attempt will still help you.
That’s it. See you in class.
Optional Preparation
The following is more material on TBL, that repeat some of the parts explained above and provide more details. They are optional for this seminar.
Webinar
In 2023 i recorded a webinar on TBL. Have a look if you like.
Videos on TBL
In case you have more time, you can browse through the videos listed below. They show how TBL is used in various other universities.